Creating a Connection using modern authentication (OAuth 2)
Understanding OAuth Requirements for your Provider
OAuth 2 is the industry-standard protocol for modern authorization. DAS supports this authentication standard by leveraging Access Tokens and Scopes. For more information on OAuth, see the OAuth 2 standard.
When a user authenticates against a resource by providing their username, password and typically an MFA (multi-factor authentication) method, an Access Token is generated. Access Tokens are the result of a successful login challenge but contain no user or authorization information.
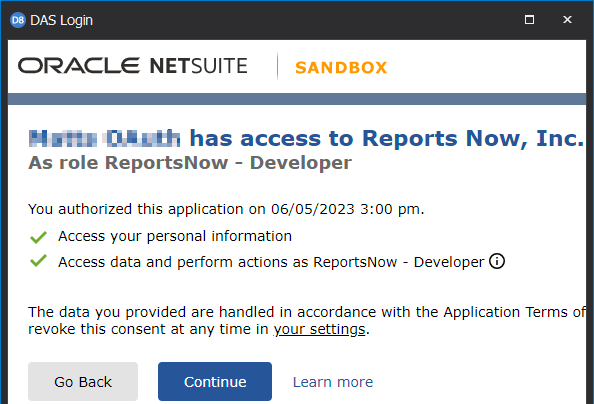
When configuring your OAuth 2 connection, you need to provide a list of applicable Scopes. These scopes limit an application's access to the user's account. During a login challenge, these scopes are presented to the user in the consent screen similar to the following:

Using Access Tokens and Scopes
We allow referencing the Access Tokens within your connection properties by using the pre-defined token <OAUTH_TOKEN> and Scopes by surrounding the scope's name by angle brackets (e.g. <name>).
Different providers may require specific Scopes for access. DAS attempts to handle connections in a generic way by leveraging Scopes within the provider's connection string. Since each provider has different properties, you'll need to understand which Scopes are required for that provider.
For user-based connections, at the minimum, you'll need the Access Token and the User Id to be set in the connection string. For example, if the provider has an Access Token property (typically within their OAuth section), you would set the value of that property to the pre-defined token <OAUTH_TOKEN>.
To get the User Id, you'll need to request access to that information as a Scope. In many instances, you'll request the email scope. You will request this scope in the Integration section of your settings. You'll then use the name of the scope for the token (<email> in this case) in the provider's property for the User Id.
Creating the connection
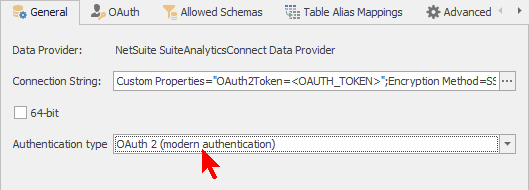
You can create an external data connection using OAuth 2 on either the client or the server. First choose the OAuth 2 Authentication Type, then edit the Connection String by clicking the  button.

Note
Server-side connections will have additional authentication features.
Configuring a Provider (NetSuite example)
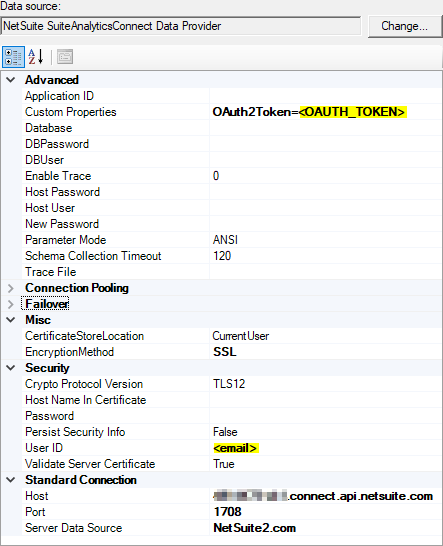
Below is an example for configuring a NetSuite provider using the SuiteAnalyticsConnect driver.
Note the highlighted fields. These tokens will be replaced with the authenticated values returned from the login challenge. This provider uses the OAuth2Token property in the Custom Properties section, and also requires the User ID to be set for OAuth authentication.
Here we set the OAuth2Token property to the <OAUTH_TOKEN> token, and since the User ID must also be set, we use the value returned from the email scope.
These tokens are defined by the token name, surrounded by angle brackets (e.g. <name>) and will be replaced within the connection string when the report is run or the data source is opened.

Integration settings
Once the OAuth 2 Authentication Type is selected, the  OAuth tab will be shown. These settings are required for OAuth 2 authentication.
Important
These settings will be given to you by the provider administrator.

Note
Scopes are a property of the OAuth 2 authentication settings. These scopes are defined by the provider and can be used within the Connection String of the External Data connection, such as in the example above.
Authenticating the connection
Once the connection is configured and saved, the  Authenticate button will be enabled on the External Data Connections toolbar. You can click this button to begin the authentication challenge or open the connection. Once the challenge passes, you can use your connection until the Access Token expires. At this point, you will need to login again to continue using the connection.