Create a Job Cost Report
A Job Cost Report setup is similar to what is found in other Financial quick reports, but line item setup is done for jobs and by selecting specific ledger types. A key difference for a Job Cost report is that it is primarily focused on showing the job/project inception to date performance instead of a standard financial account inception to date or year to date outlook.
Specify What Data You Require
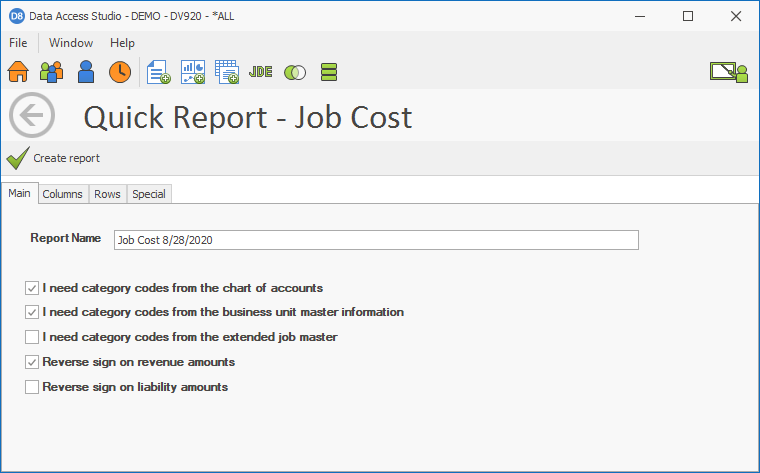
The first step of defining your report is to name your report and choose to include/exclude asset master information or business unit information. Enter this information on the Main tab:
| To | Do this |
|---|---|
| Name your report (Required) | Click on the edit box next to Report name and type a descriptive name for your report. This is a mandatory step. |
| If you need chart of account information in your report | Click the check box labeled: I need category codes from the chart of accounts. |
| If you need to access category codes in the JDE Business Unit table (F0006) | Click the check box labeled: I need category codes from the business unit master information. |
| If you need to reverse signs on your revenue or liability accounts | Click the check box labeled: Reverse sign on revenue accounts or Reverse sign on liability accounts. |
| If you need access to the JDE Extended Job Master (F5108) | Click the check box labeled : I need category codes from the extended job master. |
The following columns are added from the Account Master:
DL01, LDA, PEC, BILL, CRCD, UM, ANS, BPC, CO, MCU, OBJ, SUB, R001, R002, R003, R004, R005, R006, R007, R008, R009, R010, R011, R012, R013, R014, R015, R016, R017, R018, R019, R020, R021, R022, R023
The following columns are added from the Business Unit Master:
STYL, DL01, AN8, MCU, CO, RP01, RP02, RP03, RP04, RP05, RP06, RP07, RP08, RP09, RP10, RP11, RP12, RP13, RP14, RP15, RP16, RP17, RP18, RP19, RP20, RP21, RP22, RP23, RP24, RP25, RP26, RP27, RP28, RP29, RP30, PECC, CT, MCUS, BTYP, PC, AN8O, D1J, D2J, D3J, D4J, D5J, D6J
The following columns are added from the Extended Job Master:
BSCT, BSFY, BTCT, BTFY, RCS1, RCS2, RCS3, JCF6, JCF7, JCF8, JCF9, JCF0
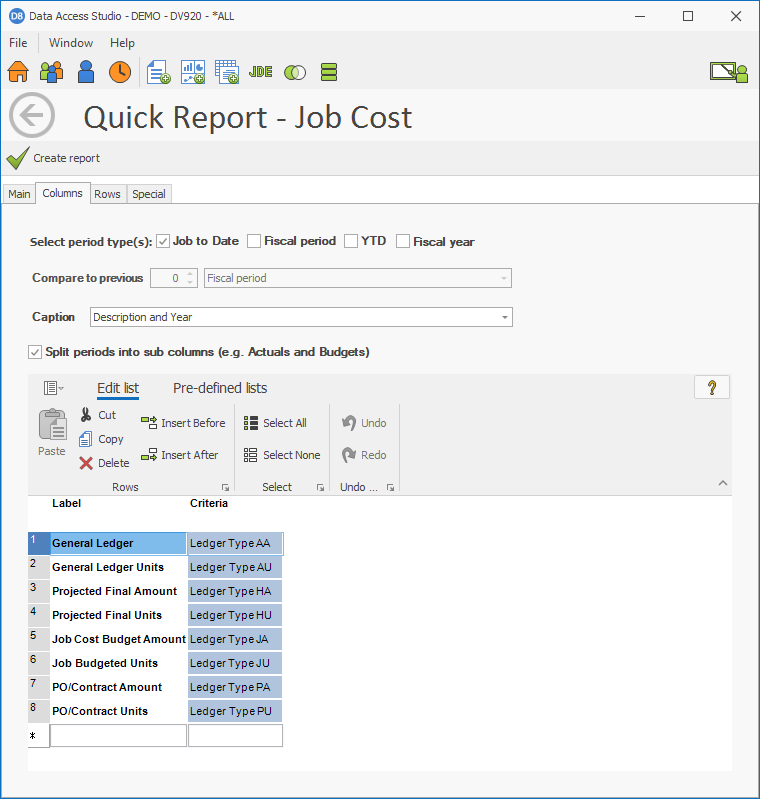
Specify Job Cost Columns
You can show amounts by fiscal year and Year-To-Date. You can also compare period amounts to amounts in previous periods or years.
| To | Do this |
|---|---|
| Select period type(s) | Click the Select period type(s) option box. Select Job to Date Fiscal Period, and/or Fiscal Year. |
| Compare to previous Fiscal periods | Change the Compare to previous number to the number of periods you want to compare against. Set the option box next to the number to Fiscal Period. |
| Compare to previous Fiscal quarters | Change the Compare to previous number to the number of quarters you want to compare against. Set the option box next to the number to Fiscal quarter. |
| Compare to previous Fiscal years | Change the Compare to previous number to the number of years you want to compare against. Set the option box next to the number to Fiscal Year. |
| Change the Caption for the period columns | Select the desired caption setting from the Caption drop down:
|
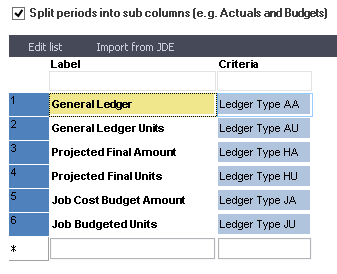
| Split periods into sub columns (e.g. Actuals and Budgets) | Check the option box labeled: Split periods into sub columns (e.g. Actuals and Budgets). This option is selected by default. It gives you the opportunity to create a list of Actuals and Budgets, allowing you to change the criteria of your ledger types. Once checked, see Financial Column Rollup to specify how to split the period values. Uncheck the option box if you do not wish to split periods into sub columns. |
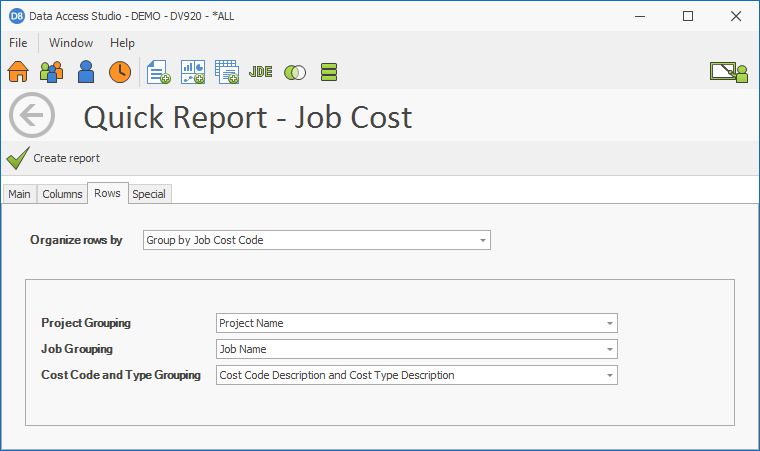
Specify Job Cost Row Rollup
The next step is to define how you want to organize your row information. You have three choices depending on your needs:
- User Defined List - Manually define each account rollup
- Chart of Accounts - Use the JDE Chart of Accounts to define the account hierarchy
- Job Cost Code - Rollup values by the job cost code
Group by Job Cost Code
Use this option if you want to roll up simply by the object account. Select how you want to see the roll-ups labeled (Group By).
This is the default selection for Job Cost reports and allows for filtering of Jobs (F0006.MCU) and Projects (F0006.MCUS).
User Defined List
The User Defined List option gives you a flexible way to define manually how you want your financial information displayed. Each row in the grid below represents how to rollup detail information into one line. Initially, you must add each row you need. Once you are finished, you can save your list so that you and others may re-use the work you did.
The editor in this grid lets you:
- Define as many rows as you want
- Define the criteria you need for each row
Sample screen shot showing a user-defined list
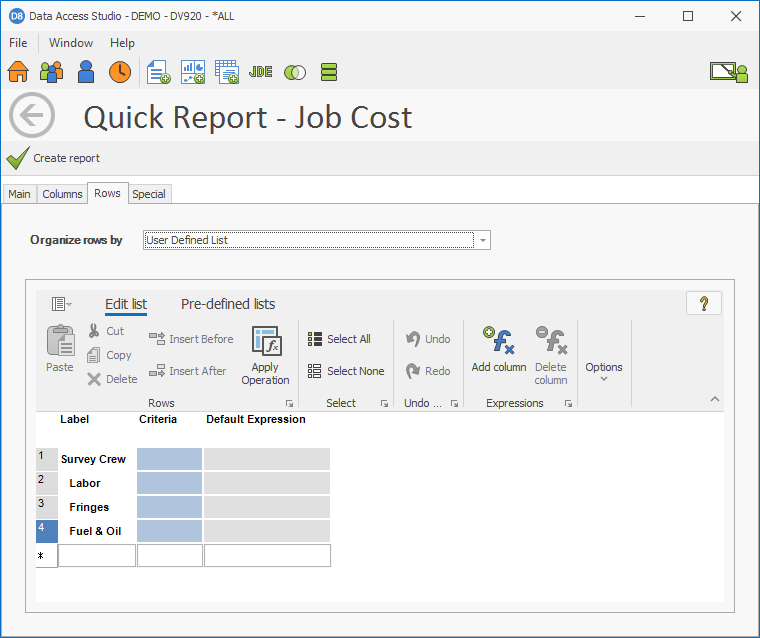
See the topic Make a List for directions on how to define the rows you want to rollup.
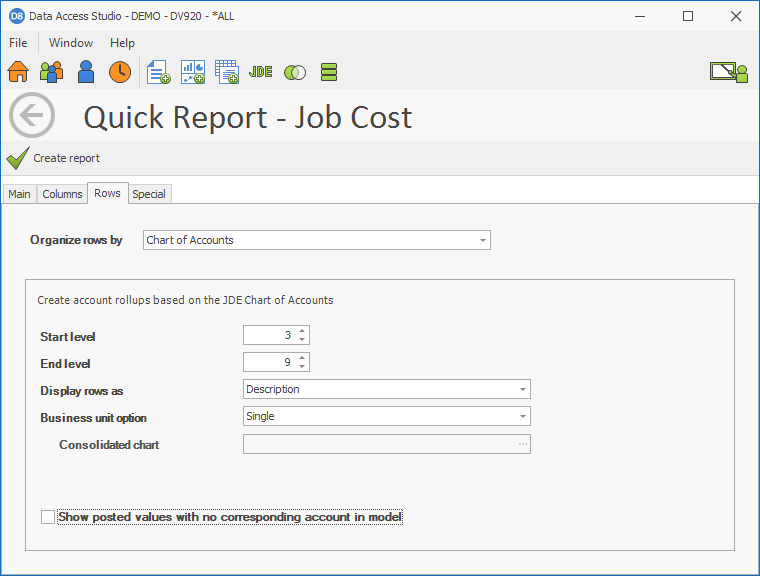
Chart of Accounts
Use the Chart of Accounts option to create a Job Cost report using the Chart of Accounts calculation column.
Special Settings
The Special Settings tab lets you set preferences for your financial report.

| To | Do this |
|---|---|
| Change how you want to prompt for date | Select By date or By fiscal period and year from the pull down box. |
| Change the text for prompting date information | Either select one of the pre-defined prompts: As of or For the period ending from the pull down box. Or you may type in your own date prompt text. |
| Exclude zero balances from the report | Check to exclude 0 balances. Uncheck to include zero balances. |
| Present your financial report with Excel capabilities | Check Excel presentation. |