Specify Output Type Post Processing
Our last step in the burst calculation is to specify the output. This is the trigger section of the burst calculation to determine that type of burst being performed. There are different Output Types.
Note
These types are what differentiate the three types of Burst reports we mentioned at the beginning of this course: Distribution, Master, or Drilldown.
Select the visual assist under Output Description to bring up the Burst Output Settings window.
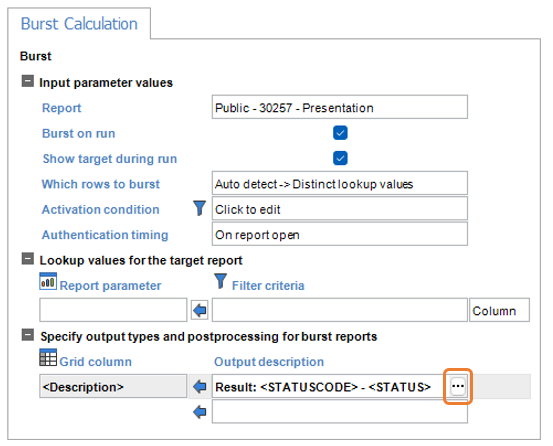
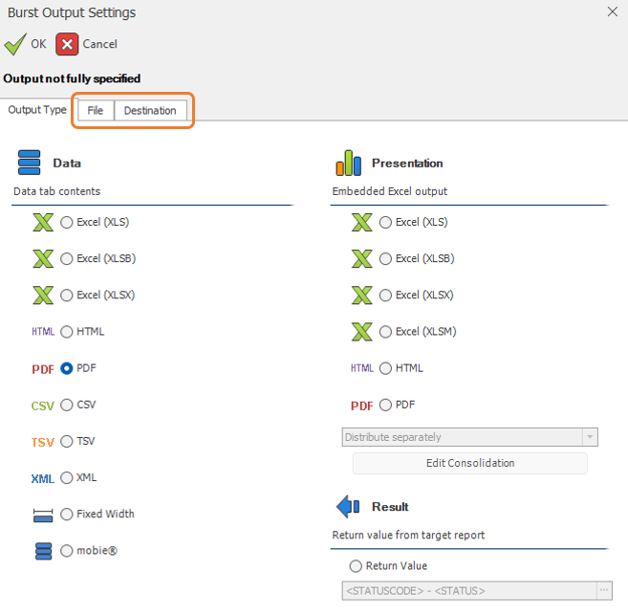
Select a radio tab, e.g. Presentation PDF in our example. On the Output Type tab, if a Data or Presentation radio button (left side of window) is chosen instead of a Result value (lower right side of window), the wizard changes views, displaying two additional tabs: File and Destination.
Note
Presentation radio buttons only appear, like the screenshot above, if a presentation layer exists in your sub-report. You may select either a DAS format or and Excel Presentation format that best suits the requirement for the distributed report. Designers may have multiple types of outputs by adding a new burst distribution output for each output type on the same burst calculations Output description portion shown with an arrow above.
Distribute separately will be selected by default. This means each bursted item will create a separate export file. For example, if you have a target report for each employee and select Excel (XLS), this instructs the burst distribution to create one Excel workbook for each employee.

You may elect, however, to Consolidate the burst outputs as well (See Consolidate Outputs). In the example above, with consolidation, you can instruct the burst to create one Excel workbook with each employee given their own sheet in that work book.